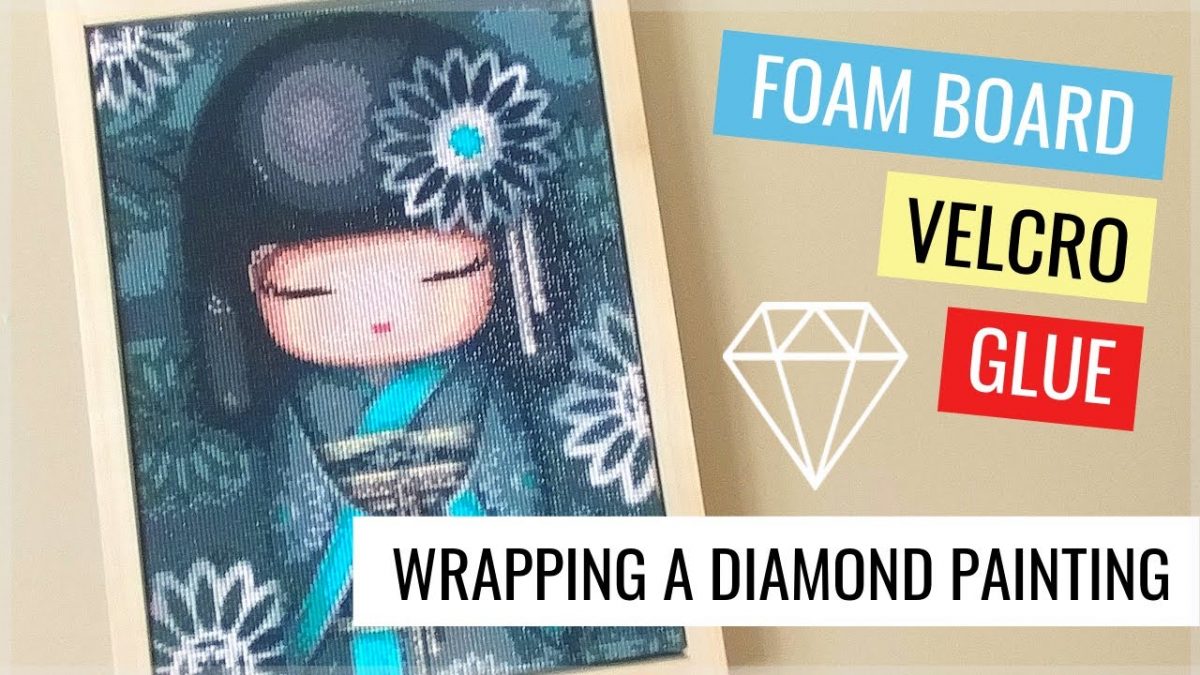
An accomplishment and a very pleasant experience, having your finished diamond painting framed. For those who are brand-new to the field of diamond art, diamond painting is a craft that has been more well-liked recently. It involves applying tiny, brilliant resin diamonds with a diamond painting tool on a self-adhesive, pre-printed canvas to produce stunning, brilliant drawings. Mounting the artwork on foam board is one of the best and simplest methods to display your finished diamond painting kit. This technique doesn’t need any specialized equipment or knowledge, unlike some others. To assist you in creating diamond artworks, you can get Cheap Diamond Art Kits.
Supply list
These are the items you need:
Spray glue
Scissors
Ruler
Finished Diamond Painting Kit
Foam board
Utility knife
What is foam board?
Depending on its intended application, foam board is a lightweight material comprised of hard plastic foam that has a paper or plastic coating. It can be sliced, adhered, written on, or drawn on. It comes in a range of sizes and can be applied to numerous tasks.
Step 1: Measure the Diamond Painting
Measuring the painting is the first step in mounting the piece on the foam board. To determine the exact measurements of your artwork, use a ruler or tape measure. Ensure that you solely measure the design. Include no borders. You can carefully cut out the border of your diamond artwork, leaving only the painting, or you can wrap the extra canvas around a wooden board. Write down the precise measurements because you’ll need them to cut the foam board.
Step 2: Cut the Foam Board
Next, cut the foam board to the same size as the diamond painting using a craft knife and cutting mat. Remember that cutting foam board differs slightly from cutting standard poster board. You might need to change the blade if the knife is not cutting cleanly or appears to be caught in the foam. Make sure to cut the foam board correctly to avoid having your artwork fall out of place. Make sure the edges are straight by taking your time. To prevent cutting with a curved or uneven edge, you might want to use a ruler.
Step 3: Put double-sided tape on the foam board
Apply double-sided tape to the foam board’s surface after trimming it to the right size. Make sure to cover the board’s whole surface with tape. It can seem alluring to switch to spray glue, but since it dries more quickly, you might not have enough time to arrange your creations on the board appropriately.
Step 4: Attach the Diamond Painting to the Board
The diamond painting should next be placed gently on the foam board. Make sure to align the picture’s edges with the foam board’s edges. Once it’s in position, firmly press down to achieve a strong adhesion. Aim to keep the diamond bit from being moved or harmed. If the border was left on, wrap any extra canvas around the board and secure it with glue.
Step 5: Cut Off Excess Foam Board
If there is any extra foam board around the painting’s edges, trim it off with a pair of scissors. Be careful not to cut the painting; instead, cut as near to the edge as you can.
Step 6: Frame Your Diamond
You can now frame your diamond artwork after mounting it on the foam board. You have the option of purchasing pre-made frames or creating your own from materials like wood, metal, or plastic. You might also have a professional framer frame your mounted artwork. If you decide to create your own frame, be sure to accurately cut the material to fit the picture after measuring it.
Displaying your artwork by mounting a diamond painting on foam board is a terrific idea. It is a quick and inexpensive technique to make a solid surface for your artwork. You may make a stunning piece of home decor that displays your ingenuity and labor of love by using the correct tools and the methods above. To assist you in creating diamond paintings, you can purchase Diamond Painting for Sale from the app store.